I blog about anything I find interesting, and since I have a lot of varied interests, my blog entries are kind of all over the place. You can browse my tags to sort them by topic and see which ones I frequently write about, or the archive has a complete history of my posts, dating back to 2008!
Besides my blog, I have pages for my creative projects, which are linked to on the navigation bar.
I write a lot about Linux and Android, Minecraft, and I like to rant about stuff. Generally anything that makes me curious. Also check out my Bookmarks for all sorts of cool websites about various topics I'm interested in.
For the geeks: this website respects your privacy and doesn't run any third party ads or analytics. This site speaks HTTP and doesn't require any JavaScript to work.
Linux of the 90's
Gnome Shell is just so, so awful that Cinnamon was spawned as a way to get a more traditional (read: Gnome 2-like) desktop environment out of the utter mess that is Gnome Shell, except that Shell's bad design decisions are rotten to the very core and Cinnamon has to suffer for it as well.
Just to pick on one specific problem, Metacity no longer supports re-theming the window manager without logging out and back in. How many window managers in the world follow this behavior? Let's count them:
I was very impressed with the MATE desktop environment when I tested it on Linux Mint... it is the exact same Gnome 2 that I used to love. The panels behaved the same way (read: fully effing configurable and requiring no log-outs to see your changes take effect), it had all the same applets and didn't come with the high-and-mighty "we know better than you and you may have ONE of each applet at most" attitude that Cinnamon has... and it doesn't use Metacity 3 so that all kinds of theming takes effect immediately.
So there's MATE, XFCE, KDE, LXDE and a good handful of window managers that exist here in the 21st century, and then there's Gnome Shell, and by extension Cinnamon, stuck back in 1995 which is the only place that their lack of features can possibly fit in.
</rant>
I decided to keep things simple, and went with a plain text, ASCII based file format for the Tyd archives. Originally I was planning to make it a binary file format, but I didn't wanna have to deal with C-style data types (which would probably end up imposing limits on me, for example a 32-bit number has a maximum value of about 4 billion, which caused problems with the FAT32 file system by limiting maximum file sizes to 4 GB). So, plain text keeps things much simpler.
First, I'll show you what an example Tyd2 archive looks like:
TYD2:SHA1:46698a6530d53ca7004719bcad5095efaa09420a

[header]
name=Untitled Archive
packager=Archive::Tyd/2.00

[file:/file1.txt]
asize=68
atime=1345597264
checksum=97503ea37402b56b429c5210e9cfcd843c38b486
chmod=33204
ctime=1345597264
index=0
mtime=1345597264
size=51

[file:/file3.txt]
asize=32
atime=1345597264
checksum=37c9daa7930605795dbc00753e7d93c0da50b9e5
chmod=33204
ctime=1345597264
index=1
mtime=1345597264
size=24

[content]
VGhpcyBpcyBmaWxlIG51bWJlciBvbmUuCgpJdCBpcyBhIHZlcnkgc21hbGwgZmlsZS4K
VGhpcwppcwp0aGUKdGhpcmQKZmlsZS4K
The archive resembles an INI file in some ways. The very first line begins with "TYD2" as a sort of magic number for the file format, and then the checksum algorithm that's being used throughout the entire archive (SHA1 in this case), and then the SHA1 checksum of the entire archive itself (this is, the checksum of the entire file after the first line). This way the archive can easily self-validate.
Then we have the [header] section, with archive headers. Tyd 2.0 supports pluggable "file mangling algorithms" which will let you compress or encrypt the file contents in any way that you want. If an algorithm is being used, one of the headers will be "algorithm" and will name the algorithm being used; for example, "algorithm=CipherSaber". In this example, no algorithm is used.
Then there are [file:*] sections. There's one for each file in the archive. Each file contains a handful of attributes, like their creation and modification times, chmod permissions, file size and "archive size" (the size of the Base64-encoded data in the archive itself), and most importantly, an index number. This is how Archive::Tyd is able to "pluck" the file's data out of the [content] section.
In the [content] section lies the Base64-encoded data that belongs to each file mentioned in the file table, with one on each line. So, for the file whose index is "0", the very first line after the [content] section belongs to that file. The file with index "1" has the second line, and so on.
When an algorithm is used to mangle the file data, the data gets mangled before being encoded in Base64. So, for example, if you use CipherSaber to password-encrypt your file data, their data is encrypted and then encoded to Base64 (so you can't simply Base64-decode the data; you'd still have to decrypt the result with the CipherSaber password that was used).
You could just as well create a compression algorithm to use for this, for example something that uses Compress::Deflate7, but I'm not sure how useful compression will be considering the Tyd file format itself is kind of bloated (since it's ASCII based and not binary). But to each their own.
Anyway, this project is still in development. I plan to at least work out a way to get RSA encryption and signing to work before I release this module to CPAN. One idea I have for RSA signatures would be:
There would be support for custom blocks in the file, so you could create a [signature] block to hold the RSA signature, and a method to get the entire file table as a string. So, you could create your archive, get the file table out of it, cryptographically sign the table using your RSA private key, and then include the resulting signature directly inside the Tyd archive itself.
Also, I have yet to think up a way to support encrypting the file table itself, in cases where the file names and attributes are to be considered sensitive information as well.
Stay tuned.
You can check out the progress so far on GitHub: https://github.com/kirsle/Archive-Tyd.
I like to keep my Facebook separate from my other web browsing, so I use Google Chrome for Facebook and Firefox for everything else. This way, Facebook will have a harder time tracking me across the web through those "like" buttons if they don't have a logged-in cookie for me, since web browsers don't share cookies.
But this becomes annoying when somebody sends me a Facebook link on Pidgin, because it would open in Firefox when I click it and I'd have to copy/paste the link to Chrome instead. So, I wrote a little wrapper script to make this all automatic for me.
I set this script to be my default web browser, so anytime a program wants to open a link, it calls my script instead of Firefox. Then my script looks at the domain name from the URL, and opens it in Chrome if it's a facebook link, or Firefox otherwise.
Here's the script for others to use. You can also download it here.
#!/usr/bin/perl

# browser-wrap: Set this as your default browser to open certain links with
# certain browsers.
#
# To get `xdg-open` to use this, put this in your ~/.profile (update the path
# to match where you installed the script to):
#
# if [ -n "$DISPLAY" ]; then
#     BROWSER=/home/kirsle/bin/browser-wrap
# fi
#
# --Kirsle
# http://sh.kirsle.net/

use 5.14.0;
use strict;
use warnings;

#------------------------------------------------------------------------------#
# Configuration Section                                                        #
#------------------------------------------------------------------------------#

# Define your browser rules here.
my $rules = {
    # These are domain names to match. Use a regular expression.
    qr/(facebook|fbcdn)\.(com|net)/ => "google-chrome",
};

# Default browser for links that don't have rules that match.
my $default = "firefox";

#------------------------------------------------------------------------------#
# End Configuration Section                                                    #
#------------------------------------------------------------------------------#

# Get the URL passed in.
my $url = shift(@ARGV);
my $browser = $default;

# Looks okay?
if ($url =~ /^https?:\/\/([^\/]+)\/?/i) {
    print "Domain: $1\n";
    my $domain = $1;

    # Look for the best rule.
    my @sorted = sort { length($b) <=> length($a) } keys %{$rules};
    foreach my $rule (@sorted) {
        if ($domain =~ /$rule/i) {
            # Matched!
            $browser = $rules->{$rule};
            last;
        }
    }
}

# Launch the browser.
my ($app, @args) = split(/\s+/, $browser);
exec($app, @args, $url, @ARGV);
Update (Oct 2021): while this blog post is obviously VERY old now, describing a version of Android from almost a decade ago, the basic steps still apply; android-x86.org still produces Android x86 images for modern versions of Android and they still install the same.This information is a little hard to find on the Internet. This is how to install Android 4.0 (Ice Cream Sandwich) in VirtualBox, in a "do it yourself" way (installing from an ISO image). There are some people who have made pre-installed VirtualBox images, but one problem you may run into going that route is that the Android serial number will match everybody else who's using the same image as you, since Android generates this number on its first boot.Sometimes they include Gapps out of the box, sometimes not, google around if they don't and you need them. I haven't played with Android-x86 in some years now, the last image I did install (around 2019) had Gapps and I used this VM to manage my Google WiFi routers because my primary Android phone was de-googled and could not use the Google WiFi app. Your mileage may vary.
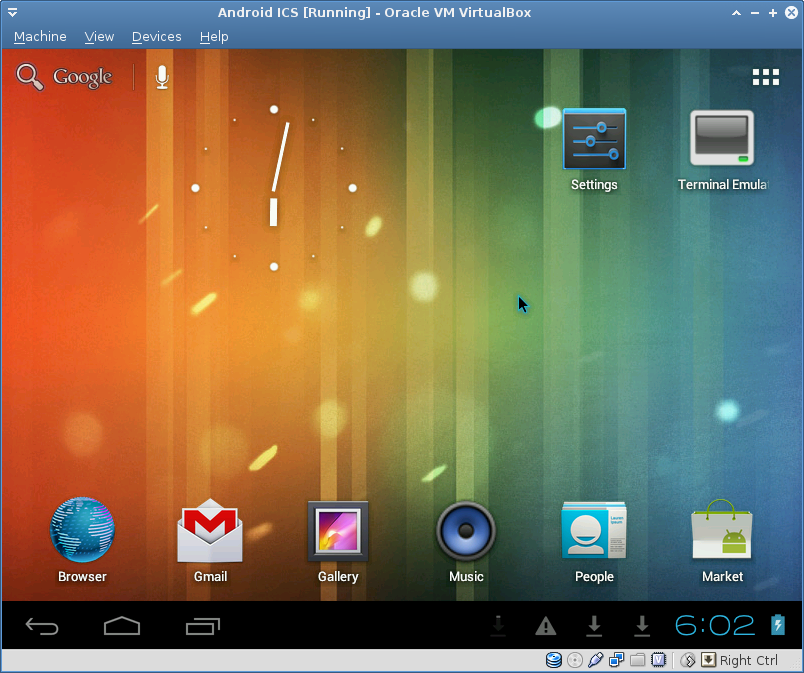
Screenshot of my Android VM. Click for bigger version.
Apparently, the official Release version of Android 4.0 from android-x86.org should work completely out-of-the-box in VirtualBox: android-4.0-r1. I have an older development release linked later in this post that was built specifically for VirtualBox, which is what this post was originally written about. The Release version of Android 4.0 also contains Google Play and the other Google apps out of the box, so you can skip the part about installing the Google apps later. Thanks @DrDeve for pointing this out!
(Update 8/30/13)
This blog post is about a very particular build of Android 4.0 that is linked to later in this post. The instructions that follow are known to work when installing from that ISO image. There does exist Android 4.3 ISOs from android-x86.org and when I tested them, a lot of stuff seemed to just work out of the box in VirtualBox, but this blog post isn't about Android 4.3.
Also, if you're using a different Android 4.0 ISO you found somewhere else, there's no guarantees it will work very well for you. Networking and audio are some of the biggest problems I've seen in Android virtualization. So, before you ask me for help with installing or getting the networking to work (hint: networking should just work with no extra fuss), make sure you're actually using the ISO image linked later in this blog and not some other random one. The one I have was designed specifically for VirtualBox and it works.
The folks at Android-x86 have been making x86 builds of the Android OS for quite a while now, and none of this would be possible without them. They have ISO images for various versions of Android available, but most of them don't work very well in VirtualBox. For example, their "eeepc" image for Android 4.0 has issues with the audio drivers and the network (it has no Ethernet support built in, etc.)
So this means using one of the Android-x86 images from there won't get you too far because audio and networking won't work. Fortunately, somebody has put together an ISO image that's been custom tailored to VirtualBox. I don't remember where I found this ISO image; if it's yours, leave me a comment and I'll edit this post. ;) I found the ISO here: android-x86 VirtualBox/VMWare support (thanks @jakimfett!)
I have a copy of this ISO hosted here: android-x86-vm-20120130.iso (244MB). This ISO works much better.
Make sure you add the SATA Controller if it does not appear, when you setup the virtual box and then add the ISO image and virtual disk image to this.It worked for me as listed above (IDE CD drive, SATA hard disk), but this is something to keep in mind if you have any issues booting the CD or installing it to disk.If you try and add the ISO image and virtual disk image to the IDE Controller this will not work at.
This information maybe useful to someone making this mistake.
cfdisk.
Internet not working is often because the kernel has no driver for your NIC and / or you are in bridged mode(Update: 8/30/2013) This is a common question people have, is how does the Android VM's connection to the Internet work?The AMD-PCnet is the standard for virtual drivers for VB and VMware - including the heavy iron VmWare ESX -- no matter what you have installed switch VB settings to the PCnet driver and use NAT -- IT WILL JUST WORK IF YOU DO! Native drivers often dont start until you open VB settings box - quirky -- use the de-facto standard PCNET NIC driver.
I'd refer you to the VirtualBox documentation about networking, but briefly: configure your guest OS's network to use NAT mode. This is the simplest way to do it.
What happens in NAT mode is, Android will boot up, see an imaginary router handing out IP addresses, and get one. And, it doesn't matter what your real life network layout looks like (whether your physical computer is connected to Ethernet, Wifi, a 4G LTE dongle, dial-up modem, VPN), the Android virtual machine will always think it's connected to Ethernet. So, questions of "how do I connect to my Wifi?" don't make any sense when you understand how VirtualBox (and most other virtualization systems) work. If your host computer has an Internet connection, the virtual machine should have it as well, automatically.
This may be a bit confusing for Android users though because Android typically doesn't use Ethernet. The lock screen in the Android VM will say "No Internet connection", and in your settings, Wifi will probably be turned off and resist turning on. Completely ignore both of these things. The VM is using Ethernet for its connection, so just try opening the web browser and point to kirsle.net or something and see if it loads.
The Escape key on your keyboard corresponds to the Back key in Android. The context menu key on your keyboard corresponds to the Menu button in Android (the context menu key is usually next to the right Windows key).
To power off the VM, press HostKey+H. This will cause Android to pop up the shutdown dialog that you'd expect on a real phone. You can also use the "Machine->Send Shutdown Signal" to do the same.
Update (9/3/2013): @DrDeve mentions how to get out of the lock screen when Android's Powersave kicks in:
OK, one more thing I forgot -- PowersaveFor some darn reason you cant bring a VB ICS 4.0.4 build out of powersave (hybernation for my Windows friends) by clicking on the video screen.
So if your VM goes into lockscreen while you are playing a game or something, after stopping for about 2 min (time to lock is configuratble in Settigns)
You will need to press on the right menu key several times, once only shows a lockscreen "ping"
the menu key is the key between the right hand alt and Ctrl keys on most modern keyboards
have fun
The Doctor
You may notice that this Android VM doesn't include the Android Market, GMail, or Google Maps. These are some of the Google Apps and due to some licensing restrictions Android-x86 doesn't include them "out of the box".
On a real Android device that's been rooted and flashed with a custom ROM, you'd install the Google apps by flashing them in recovery mode. But you can't get into recovery mode on VirtualBox. Thus, the method for installing the Google Apps is kinda sketchy, but it works (and if you know of a better way, feel free to tell me).
You'll need a file with a name like "gapps-ics-20120304-signed.zip". These are the Google apps (the date part might be different). You can Google them, but I have a copy of them here to download too.
You don't really need the entire Google Apps file, actually. Just the "system" folder inside the zip file. Create a new tar file of the "system" folder so that it will be easy to get it into your Android device. I have a prepared "system.tar.gz" for you if you just want to use mine.
$ cd /sdcard/Download
$ tar -xzvf system.tar.gz
$ su
# cd /sdcard/Download
# cp -rf system/* /system/
Pay special attention to the
cp -rf command. Make sure the slashes and *'s are in the right places.Note: in my experience, the Market app will be somewhat unstable. When you start the app, it will Force Quit after 10 or 15 seconds. However, if you're fast enough you should be able to quickly search for a specific app you'd like and begin the download process before Market crashes, and the app will continue to download and install regardless.
I imagine that the unorthodox way of installing the Google Apps might be partly to blame for the Market being unstable. The other Google apps seem to work fine though.
The general steps are as follows. Substitute 1024x768 with whatever resolution you want. You can add multiple video modes by changing "CustomVideoMode1" to be "CustomVideoMode2", etc.
VBoxManage setextradata "Android ICS" "CustomVideoMode1" "1024x768x32"UVESA_MODE=1024x768 to the end of the boot arguments (make sure to hit Space first), and press Enter.Update (9/3/2013): @DrDeve mentions in the comments:
If you install GRUB bootloader you can hit e to edit like you say, or a, then press space and type vga=ask then press enter.a long list of VESA modes (and the color bits from 8-32) will be displayed. Not all will ork, so selecting one here, resetting the VM if it doesnt work BEFORE editing the config files may save you from bricking your new toy!
Each entry is a thre char hex value, follwed by the resolution, like 1024x768x32, etc.
Once you find a mode that works, THEN modify the config using the hex value that worked using the methods above.
You can als edit the GRUB menu.lst to add the value from the sceen above
- convert the hex value that worked to decimal (i.e. 360 becomes 864, etc).
- open terminal
- su
- cd /mnt/grub
- vi menu.lst
- add vga=864 to the end of the line that startes with "kernel", or if one is there, modify it
- save the file by entering :wqif you havent used vi before you might need a guide open beside you look here http://www.cs.colostate.edu/helpdocs/vi.html
Your mileage may vary.
What does Chrome's Omnibar do for you? It lets you type in URLs to websites like any other address bar, and it lets you search Google by typing in a search query instead of a URL. Oh and when you're typing the URL to a page you frequently visit, it auto-completes it for you. Is that all?
Well, Firefox's AwesomeBar (their word for the same feature) does all of the above just as well, and then some. Want to search Google? Just type in your search query. It all works exactly the same way as Chrome. Firefox has been doing this before Chrome even existed. Auto-completing URLs? Firefox does this too.
But then Firefox goes way beyond. You saw a post on Reddit 5 months ago, and you know it's somewhere in your history and you wanna find it? Just type one or two words that appeared in the page title. Firefox's AwesomeBar will show suggested results as you type based not only on the URLs, but also on the page titles. Bam. You can find any page in your history just by typing a word from the title. With Chrome, the only way to find an old page is to begin typing its URL out. This requires you to know a lot more about the link than you need to know for Firefox.
For a Reddit example, say you want to look up a post you saw recently about the Galaxy Nexus Android phone. Was it posted to /r/android? Or was it /r/technology? Maybe it even was mentioned on /r/apple? You don't remember, you just remember the post was about the Galaxy Nexus. Just type "galaxy" in your AwesomeBar and you'll probably find the link in 2 seconds or less. With Chrome, you'd have to begin typing out, "reddit.com/r/android" and try all the various subreddits that it might have been posted to. You're better off opening the history window and searching for it. There's just no easy way.
Firefox 1, Chrome 0.
I took a fresh look at trying to wrangle Tkx into working on the standard Perl distribution.
Tkx is ActiveState's module that provides a modern, updated Tk framework for Perl. I previously wrote about how the old Tk module for Perl has been neglected for many years and is extremely outdated and has very little hope for being improved on. Tkx brings a more updated Tk interface to Perl.
The only problem is, it only really runs well on ActivePerl, and not the stock version of Perl. I've been testing Tkx over the years on various versions of Fedora Linux and Perl, and every time I'd get the same results: segmentation faults. It was impossible to run any code that uses the Tkx module, because attempting to do so much as use Tkx; would cause a segfault. I chalked it up to "it only works with ActivePerl" and left it alone. But now I decided to give it another go.
I was seeing the same symptoms this time as before. When trying to install it with cpan or cpanm, it would fail to install because its test suite was failing (giving errors like, can't find package tk). If I installed it while skipping the test suite, the tkx-ed example program would give segfaults when run. Just as before.
I found out through tinkering with it that I needed to yum install tk (it makes sense; Tkx is a wrapper around Tcl/Tk for Perl, so you need "the" Tk installed for it to work). With this, running make test would have it run through the test suite and I'd see all the graphical Tk windows pop up and disappear. But running tkx-ed would still give segfaults.
I believe I'd gotten to this point before. The test suite would work, but nothing else would. So I decided to try running the test suite "by hand", perl t/LabEntry.t. Segmentation fault. What? How can the test suite run all these scripts successfully but I can't run them myself? So, I dissected the Makefile that was used for the test suite.
Long story short, this doesn't work:
[kirsle@fireworks Tkx-1.09]$ perl tkx-ed
Segmentation fault (core dumped)
But this does:
[kirsle@fireworks Tkx-1.09]$ PERL_DL_NONLAZY=1 perl tkx-ed
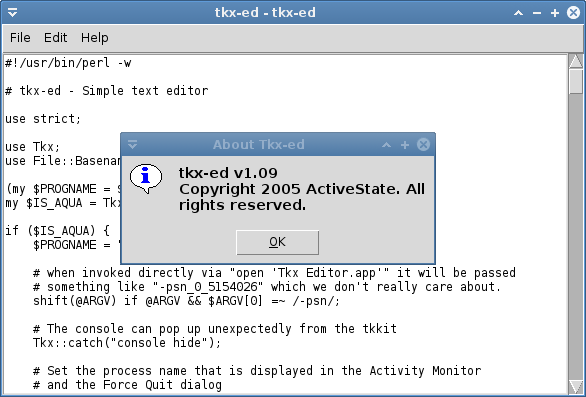
Shazam. This is tkx-ed running on a stock version of Perl 5.14.2 on Fedora 17. It seems that the PERL_DL_NONLAZY environment variable is required for the Tkx module to work. This is weird.
I don't call this a victory though. Requiring this environment variable to be set for your Tkx app to run isn't very ideal. If you wrote and distributed a Tkx app for Linux users, you'd require the users to run a Bash shell script in order to launch your program instead of just running your Perl program directly like they'd expect. But, at least it works!
Note: I also needed to
yum install bwidgetbecause tkx-ed would give a "can't find package BWidget" error without it).
Update (6/24/12):
As for that environment variable issue, I found that this will work:
#!/usr/bin/perl

BEGIN {
    $ENV{PERL_DL_NONLAZY} = 1;
}

use 5.14.0;
use strict;
use warnings;
use Tkx;

...
Since your BEGIN block gets run before Perl attempts to load the modules, you can set the variable inside your script. And now a simple perl yourscript.pl will work without segfaults. :)
I decided to take a serious look at the HTML::Defang module. It's supposed to take some arbitrary HTML input and sanitize it, removing anything potentially malicious in the process (attempts to execute JavaScript code, embedding of iframes, applets, etc.)
It does a pretty decent job, but I found one thing it doesn't handle very well by default. In CSS code, it will attempt to comment out an attribute if you attempt to use JavaScript with it. Some example input:
<span style="background-image: url('javascript:alert(1)')">
HTML::Defang will turn that into this:
<span style="/*background-image: url('javascript:alert(1)')*/">
But, if you begin and end your CSS attribute with an end-comment and start-comment instead, HTML::Defang leaves the code looking like this:
<span style="/**/background-image: url('javascript:alert(1)')/**/">
Now, granted, this sort of exploit only really hits Internet Explorer users (at least for older versions of IE), but it is a pretty big issue still. This is basically how Samy pwned MySpace, after all.
Anyway, I've written a test CGI script for HTML::Defang: you can try to break it here. I added a custom CSS handler that will neutralize JavaScript attempts from the CSS code to handle that problem I found in HTML::Defang. You can see the source code by clicking the link at the bottom of that page.
If anybody finds a way to get JavaScript to execute on that page, let me know. :) I've tried all the usual tricks and haven't found a loophole yet.
XMPP Gateways (or, alternately, Transports) are services for XMPP that let users sign on to other instant messaging networks (AIM, MSN, YMSG, etc.) through their XMPP account. So... you sign in to XMPP and the server signs you in to your other networks, and you can do all your chatting through just the one XMPP connection (Wikipedia has a nice diagram of this).
So I was wondering whether this would be a good solution for programming chatbots that work on many different IM networks. In Perl, the options for IM network connectivity aren't all that great at the moment; there is Net::OSCAR for AIM, Net::XMPP, and that's about it. Matt Austin and I were working on Net::IM::YMSG for Yahoo Messenger, but it's not that great yet (it can chat and accept add requests, but after accepting you don't see it online until the program restarts). For MSN Messenger, there's a dusty old MSN.pm module somewhere on the RiveScript forums that might still work but hasn't been updated in years.
I'm not very motivated to work more on Net::IM::YMSG because YMSG is dead to me. I created a new Yahoo ID recently, and made sure to opt-out of any directory listings, and it still gets add requests by spam bots on a regular basis. The ID is literally listed nowhere. I don't know how they find me. It is my opinion that nobody should take YMSG seriously anymore. I don't know anybody who uses it, so developing new code to use YMSG isn't worth my time.
With XMPP gateways though, one could just write an XMPP bot and let the gateways do all the work. Then you can have a bot sign on to AIM, Yahoo, MSN, ICQ, IRC, and even some obscure networks like MySpace IM, without needing to use native libraries for each protocol yourself. Sounds great, but I had some questions about how well gateways work (how many features they support per network, etc.)... so the best way to find out was to test it!
I installed the Openfire XMPP Server on my web server. Installation was surprisingly super easy. Basically all I had to do was this:
# apt-get install sun-java6-jre
# dpkg -i openfire_3.7.1_all.deb
This installed it and automatically started it, and then I went to the admin panel port on my server to set it up. I didn't have to touch any config files or anything; everything was done through the web panel and was dead simple. I set up a Jabber user @kirsle.net and then I went out in search of a gateway plugin.
I found Kraken to fill the role. Installing this plugin was super ridiculously simple too, I just copied kraken.jar to /usr/share/openfire/plugins and Openfire automatically saw it and extracted it and a new "Gateways" tab appeared in the web panel. Black magic. I later discovered that I could've just uploaded kraken.jar to a file upload field on the Plugins page on the web panel, too. This is, by far, the easiest server software for Linux that I've ever seen. I can't believe Openfire is free and open source.
So after setting the gateways up for the protocols that I care about, here is what I found:
For simple chatbots that only need to communicate over IM, XMPP gateways should work out fine. But if you have a native way to connect to a particular network, that method would most surely be preferred.
The reason I like the @aim.kirsle.net etc. suffixes on gateway usernames is because it would make it easier for a chatbot to distinguish unique users across multiple networks. In my Aires bot (which supports AIM and YMSG, through Net::IM::YMSG), and in all my older bots from years gone by, the protocol-facing code would format a user's name like "AIM-kirsle" or "YMSG-kirsle" before passing it to the main bot code. This way I could make an AIM user an admin for my bot, without any confusion about overlapping Yahoo IDs of the same name. Since the XMPP transports make a unique subdomain for each network, this can be used instead.
In conclusion, I think it will be worth it to add XMPP support to my Aires bot so that transports can be used for people who want them. Native support for a network is always preferred, but with transports you can easily put your bot on a lot more networks with very little effort.
See the comment privacy policy for details and a global unsubscribe form.
0.0016s.
![]()