I blog about anything I find interesting, and since I have a lot of varied interests, my blog entries are kind of all over the place. You can browse my tags to sort them by topic and see which ones I frequently write about, or the archive has a complete history of my posts, dating back to 2008!
Besides my blog, I have pages for my creative projects, which are linked to on the navigation bar.
I write a lot about Linux and Android, Minecraft, and I like to rant about stuff. Generally anything that makes me curious. Also check out my Bookmarks for all sorts of cool websites about various topics I'm interested in.
For the geeks: this website respects your privacy and doesn't run any third party ads or analytics. This site speaks HTTP and doesn't require any JavaScript to work.
Yum Updates Daemon for XFCEUpdate (5/28/13): I've ported this script over to Python: pyupdatesd. The Python version only requires pygtk2, which tends to come preinstalled on Fedora XFCE systems.
Since about three versions of Fedora ago, there wasn't an updates daemon for the XFCE desktop environment (or LXDE or the others, for that matter). KDE still had theirs, and Gnome 3's update daemon was built in to the desktop environment. So, XFCE users were stuck having to look for updates manually.
Not anymore!
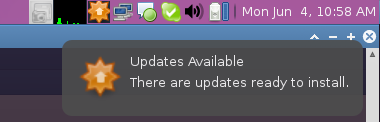
I finally got around to writing a Perl script that checks for available updates, and shows a Gtk2 tray icon and a notification pop-up when one has been found. You can set it to start up automatically in your session settings and it will check updates for you every 15 minutes.
You can get it from http://sh.kirsle.net/kupdatesd. Or you can see its source code here. :)
#!/usr/bin/perl

# kupdatesd - A simple yum update checker.
#
# This script will watch for available yum updates and show a GTK+ TrayIcon
# and notification pop-up when updates become available.
#
# This is intended for desktop environments like XFCE that don't have a native
# PackageKit update watcher.
#
# Set this script to run on session startup and it will check for updates every
# 5 minutes (by default; this is configurable in the source code).
#
# --Kirsle
# http://sh.kirsle.net

use 5.14.0;
use strict;
use warnings;
use Gtk2 -init;
use Gtk2::TrayIcon;
use Gtk2::Notify -init, "kupdatesd";

################################################################################
# Configuration Section                                                        #
################################################################################

my %c = (
    # The title to be shown on the pop-up and the icon tooltip.
    title    => "Updates Available",

    # The message to be shown in the pop-up.
    message  => "There are updates ready to install.",

    # The icon to use for the pop-up and tray icon.
    icon     => '/usr/share/icons/gnome/32x32/status/software-update-available.png',

    # How often to check for updates (in seconds).
    interval => 900,

    # The path to your yum binary.
    yum      => '/usr/bin/yum',

    # The path to your graphical updater.
    # gpk-update-viewer is provided by gnome-packagekit
    gui      => '/usr/bin/gpk-update-viewer',
);

################################################################################
# End Configuration Section                                                    #
################################################################################

# Gtk objects
my ($icon, $image, $eventbox, $tooltip, $notify);
my $visible = 0; # Icon is currently being displayed?

# Enter the main loop.
my $check = time() + $c{interval};
while (1) {
    select(undef,undef,undef,0.1);

    # Keep Gtk2 active.
    if (defined $icon) {
        Gtk2->main_iteration while Gtk2->events_pending;
    }

    if (time() > $check) {
        # Look for updates.
        unless ($visible) {
            system("$c{yum} check-update > /dev/null 2>&1");
            if ($? >> 8 == 100) {
                say "There are updates available!";
                show_icon();
            }
        }

        # Queue another check.
        $check = time() + $c{interval};
    }
}

sub show_icon {
    # Already initialized this once before?
    if (defined $icon) {
        # Just show the icon and notification again.
        $icon->show_all;
        $notify->show;
        $visible = 1;
        return;
    }

    # Tray icon. Image goes in EventBox, EventBox goes inside TrayIcon.
    $icon = Gtk2::TrayIcon->new("kupdatesd");
    $image = Gtk2::Image->new_from_file($c{icon});
    $eventbox = Gtk2::EventBox->new;
    $eventbox->add($image);
    $icon->add($eventbox);
    $icon->show_all;

    # Attach the tooltip.
    $tooltip = Gtk2::Tooltips->new;
    $tooltip->set_tip($icon, $c{title});

    $eventbox->signal_connect("button_press_event", sub {
        $icon->hide;
        $visible = 0;
        system($c{gui});
    });

    $notify = Gtk2::Notify->new(
        $c{title},
        $c{message},
        $c{icon},
    );
    $notify->show;
    $visible = 1;
}
On normal files, the permissions are pretty straightforward:
cd into a subdirectory or read/write a file that has permissions for it. But no listing the directory's contents.If anyone's interested, I wrote a Perl script that downloads and installs Firefox Nightly on a Unix-like operating system.
By default, it installs the application into /opt/firefox-nightly, with a link to run it at /usr/bin/firefox-nightly. This way, it doesn't conflict with your already-installed version of Firefox. Furthermore, it will put a launcher item in your Applications/Internet menu.
You can get it from here: http://sh.kirsle.net/ffnightly
$ mkdir ~/bin
$ wget http://sh.kirsle.net/ffnightly -O bin/ffnightly
$ chmod +x bin/ffnightly
$ ffnightly
gnome-sound-applet isn't very useful in the Gnome Shell desktop environment, because the Shell has its own built-in volume control icon on the top panel.The reason it's still around is probably just for the Gnome 3 fall-back desktop, where you get a two-panel layout similar to Gnome 2, which still has a decent system tray on the top panel. For Gnome 3 users without hardware acceleration, the gnome-sound-applet comes to the rescue to let these users continue adjusting their sound volume.
But, with Gnome Shell software rendering coming in Fedora 17, the need to maintain the system tray sound applet will quickly vanish, since even Gnome 3 users without hardware acceleration will be seeing the same shell desktop with its own built-in sound applet. This sucks a lot for XFCE and other desktop users. One of my favorite things about the Gnome sound applet is the ability to increase the volume higher than 100%, which XFCE's clunky old sound mixer applet still can't do.
Update (4/4/13): In Fedora 19, the gnome-sound-applet has disappeared. Called it! Now I'm stuck with the XFCE Mixer applet. :(
"There are currently hacks in place in Gnome Shell that allows us to run the NetworkManager applet, but place its icon in the shell panel instead of the normal system tray. So, it makes sense to just program the NetworkManager to go directly to the Gnome panel instead, and no longer support the system tray version anymore. This is good for Gnome, and anybody using XFCE or some other desktop that will have objections to this change, well they can just switch to some other distro. We don't care."
On this one, I hope I'm wrong. :) But due to Gnome's short-sightedness with some of their recent design decisions (ruining Zenity, anyone?) I wouldn't be shocked to see them come up with such an idea.
This command will turn off the monitor on a Linux box from the command line (sorta like what happens when you have your power saving options configured to do this automatically after a length of time):
xset dpms force offThe monitor turns off until you hit a keyboard button or move the mouse. With this info you could set up a keyboard shortcut to run this command and have something like a "lock screen button" on your netbook, to turn off the display on command and conserve battery life for a little bit longer than usual.
For a "lock screen button" that also locks the screen in addition to turning it off, a pair of commands like this may be handy:
xset dpms force off; xscreensaver-command --lock
That said, onward to the blog post...
This information is ridiculously hard to find on the Internet.
I was playing with Chromium OS using the Lime build provided by Hexxeh. The Lime build is the same as the Vanilla build (i.e. upstream Chromium source code built daily), but it has more driver support, and it's the only build that works with the wifi on my Dell Mini 9.
Getting it onto a flash drive and booting from it was easy enough just following the directions on Hexxeh's site, but actually installing it to the hard drive was a bit more difficult. It was hard to find any up-to-date information online; most bloggers were talking about Hexxeh's old "Flow" builds, so the instructions were outdated. When I specifically googled how to install the Lime build, I was still finding outdated instructions.
Everyone was saying that you just hit Ctrl-Alt-T to get a shell prompt, and run the install command. Not that easy. The only way I could get into any form of text mode was by hitting Ctrl-Alt-F2 (which I only knew to try because I'm a Linux user). But this got me into a text mode login prompt and it took me a while to figure out the right username/password combination.
The username is chronos and the password is facepunch. After that, I was stuck in a really primitive shell that doesn't support anything I'm used to (not even ls), so I went out on a limb and tried running the command bash (which got me into a more familiar Bash shell).
But the install command was no good in Bash -- it was running the GNU install command instead of the one to install Chromium to the disk. After some more tinkering, I found that if I ran crosh (Chrome shell) and then run the install command from there, it did what I want. So, I was finally able to install it to disk.
It didn't end up working out though. The system doesn't boot after installation. Oh well. But hopefully this blog post will help others find out how to install the darn thing.
tl;dr: here's how I figured out to install Chromium OS to disk:
chronos / facepunchcrosh, hit enter.install, hit enter.Ctrl-Alt-T doesn't work here, so I had to use Ctrl-Alt-F2 to get to the text mode login prompt.chronos / dell1234 (the "dell" user didn't work). Then I was able to start bash and then execute /etc/install_wl.sh to install the wifi.Ctrl-Alt-T works. :)install from Dell's image did the trick too, and I now have Chromium installed on the internal hard drive on my Dell Mini 9. :)Interestingly, the UI of Dell's image looks different to the Lime and Vanilla builds. The Lime and Vanilla builds had what looked like a sort of primitive desktop (complete with a wallpaper), and the Chromium browser windows could be resized and moved around the screen. Where you'd expect the task bar to be on a Windows system, was what looked more like the Mac dock, with icons representing all your opened Chromium windows (plus a couple other icons, one that brings up a menu and one that has the Chromium icon and didn't appear to do anything).
Screenshots of UI differences:
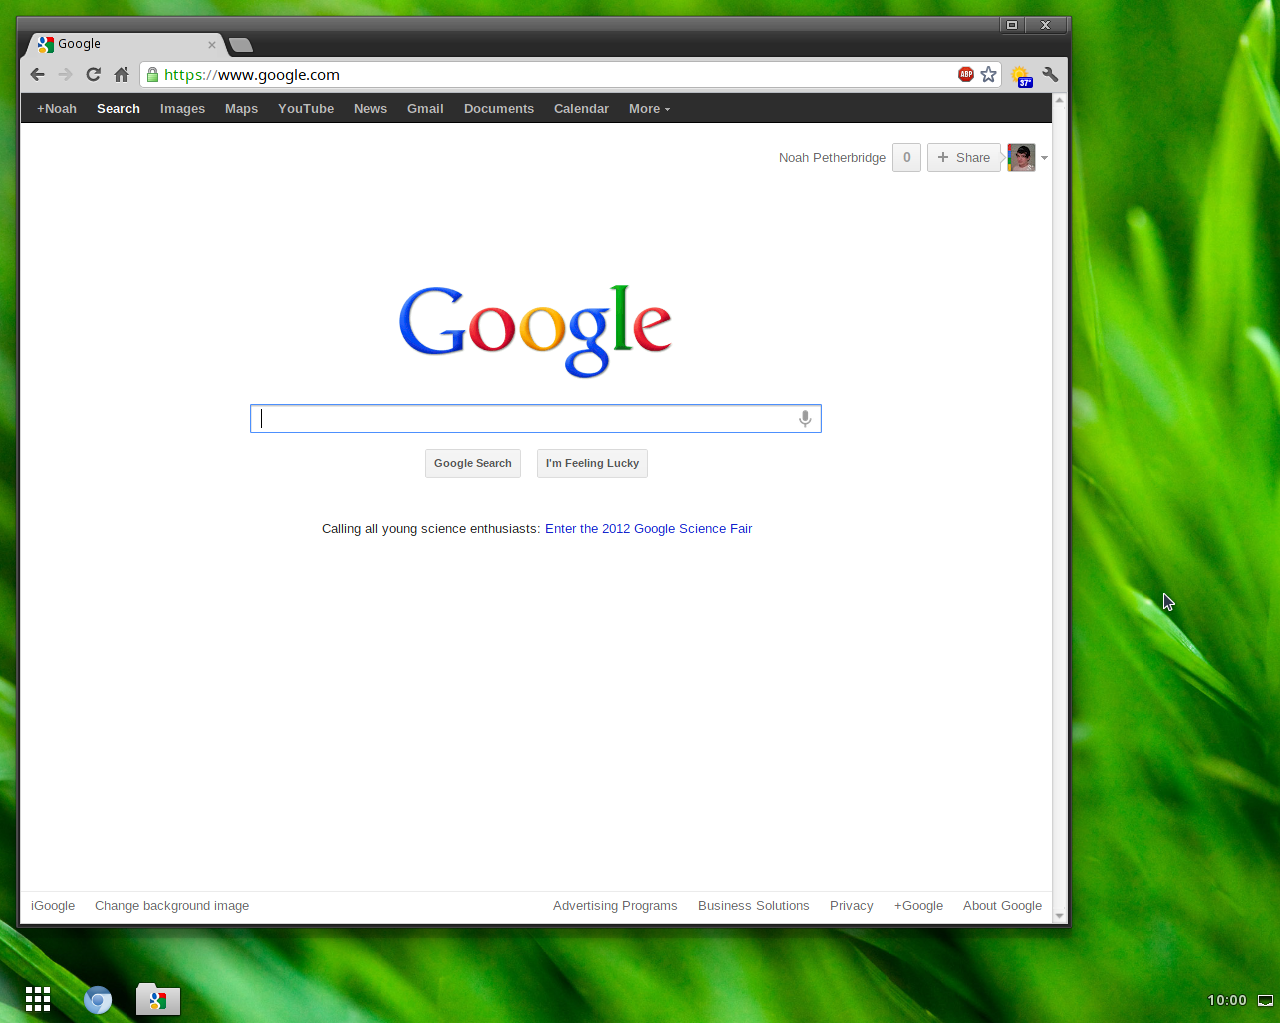
Chromium Lime (and Vanilla)
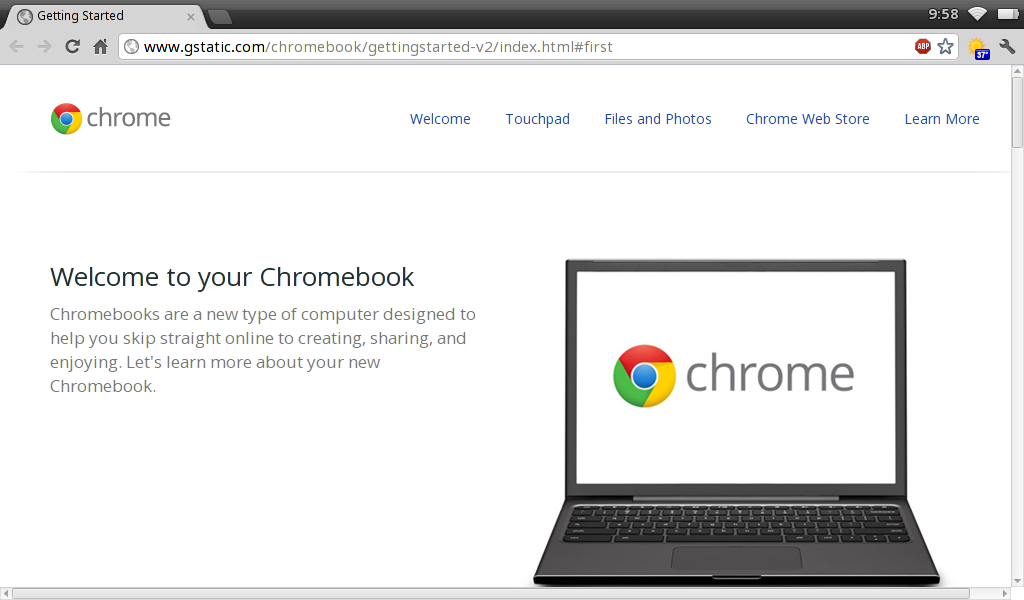
Dell's Chromium build
Dell's build looks more like the Chrome OS I've always seen screenshots of, so I think maybe the Lime and Vanilla builds are customized a bit (or else it's just a super new UI change and Dell's January image isn't up-to-date enough).
tl;dr version: it seems that the gstreamer-ffmpeg package is required for Thunar (or tumblerd, specifically) to render thumbnails of video files on the XFCE desktop for Fedora 16. This package is provided by RPM Fusion yum repository (rpmfusion-free-updates specifically).
It seems to be pretty hard to find this information online. None of my Fedora XFCE systems were able to render thumbnails of videos, and this caused me some headaches with removable drives (when I'd be done with the drive and want to unmount it, I wouldn't be able to because "the device is still busy"... and lsof /media/Cyro would show that tumblerd was the culprit... it was trying to render thumbnails of any video files I may have seen while browsing in Thunar and wasn't having much luck with it).
The usual set of packages that provide all the video codecs for me didn't do the job (vlc, smplayer, gstreamer-plugins-{good,bad,ugly}), I even tried installing ffmpegthumbnailer and no luck. Finally I installed gstreamer-ffmpeg, and after doing a killall thumblerd and then visiting a folder full of videos in Thunar, it finally worked and started making thumbnails.
In my case I wanted MSN 2011 to connect using a socks proxy (using SSH port forwarding to use an SSH tunnel as SOCKS 5 proxy).
To set the proxy settings, go to the "Connection" page in the preferences of MSN Messenger, click Advanced Settings and enter your proxy details.
The problem is, MSN will only use your proxy settings if it can't normally connect to MSN without them (i.e. if your default TCP internet connection will work, MSN will always use that instead of your proxy settings). This is how you can force MSN to use the proxy settings.
You have to block MSN from being able to connect to its authentication servers without the proxy. To do this, we have to tamper with the Hosts file.
The Hosts file on Windows is kept at C:\Windows\System32\drivers\etc\hosts (note that it doesn't have a file extension). Open this in a text editor like Notepad or the edit command in Command Prompt (I prefer the latter approach because you can open a Command Prompt window as Administrator and then editing the file is a snap without having to deal with permission issues when saving changes).
Add these lines to the Hosts file:
127.0.0.1       messenger.hotmail.com
127.0.0.1       msgr.hotmail.com
127.0.0.1       gateway.messenger.hotmail.com
127.0.0.1       login.gateway.hotmail.com
And then restart MSN and it should have difficulty connecting without the proxy settings (if using a SOCKS proxy, attempt to sign into MSN before you open the proxy to be sure that it fails to connect. Then start the proxy and see that it successfully signs in).
This works by routing all the MSN Messenger hostnames to the loopback address and blocks MSN from being able to authenticate. But with the SOCKS proxy, it can connect because it would do the DNS lookups from the SSH server instead of the local system.
Hope this helps someone!
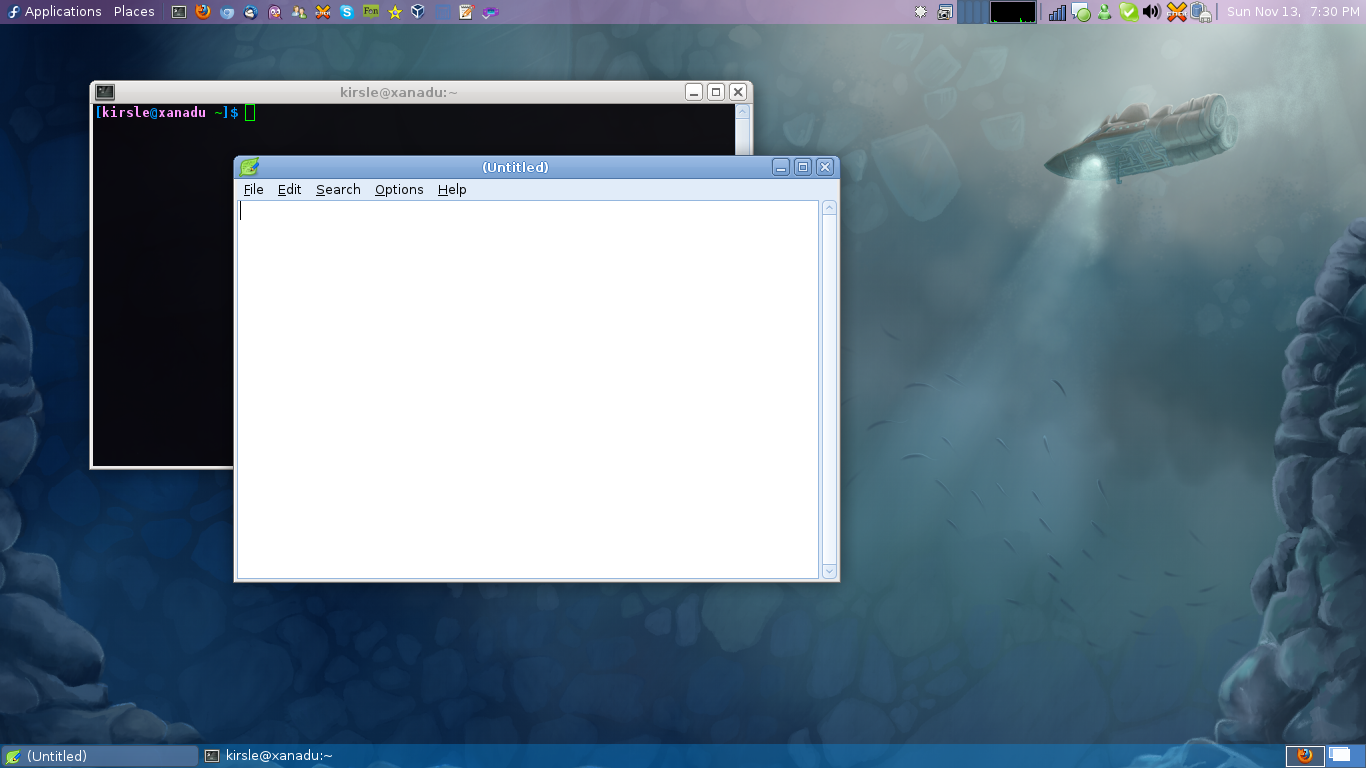
Click the screenshot for the full size version.
Along the top panel I have my Applications and Places menus, app launchers for my commonly used programs, my CPU usage graph, notification area and clock. On the bottom panel are my task bar and workspace switcher. These are all standard Xfce panel applets.
The details for anyone who's interested (the only panel applet options shown are the ones that differ from the default options):
Add a Launcher applet, set it to launch the Settings Manager (xfce4-settings-manager), rename the launcher to "System", and on the Advanced tab of the Launcher applet, check the box to "Show label instead of icon".

This won't get you a drop-down menu, but it will complete the Gnome 2 look for your main menu part of the panel. :)
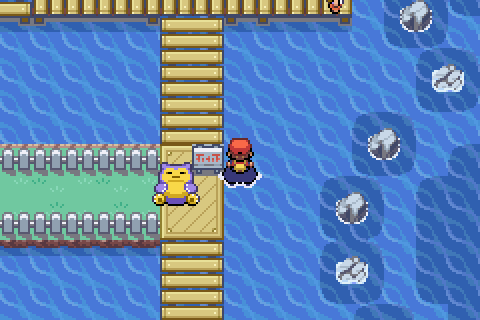
Originally, I wanted to see what would happen if you got to Fuchsia City without having taken one of the fossils from Mt. Moon... because in the Fuchsia City Zoo, there will be either an Omanyte or a Kabuto there -- the opposite fossil from the one you chose early in the game. So I wanted to see what the game would do...
But then I realized that, Fuchsia City is the perfect city to start the game in because, while there's a steep difficulty curve to get your bearings, you can actually continue the game from there and get back on track. This can't be said of all the other cities (especially Cinnabar Island).
I've divided my whole quest up into four parts, complete with screenshots. Read about my sequence breaking quest here.
0.0019s.
![]()